How to configure your CustomGPT to send emails
Have you ever been deep in a ChatGPT conversation and wanted to email a piece of it to yourself to remember later? Or wanted to share part of a conversation with a friend?
Now with CustomGPTs, you can configure your GPT to send emails on your behalf using SendGrid for free. Here’s how you can do it.
First, some things to be aware of
- It is possible to spam people with this. Don’t do that! Also, SendGrid has spam prevention systems in place and pretty soon your email will end up in people’s spam folders never to be seen again. Also, life is too short. Put that energy into something productive.
- If after setting this up, you make your CustomGPT public, people will be able to send emails using your email address paid for by you. This is probably not what you want!
To do this you’ll need: * A free SendGrid account (you can sign up here). * An email address you want to use * Access to CustomGPTs
Get set up with SendGrid
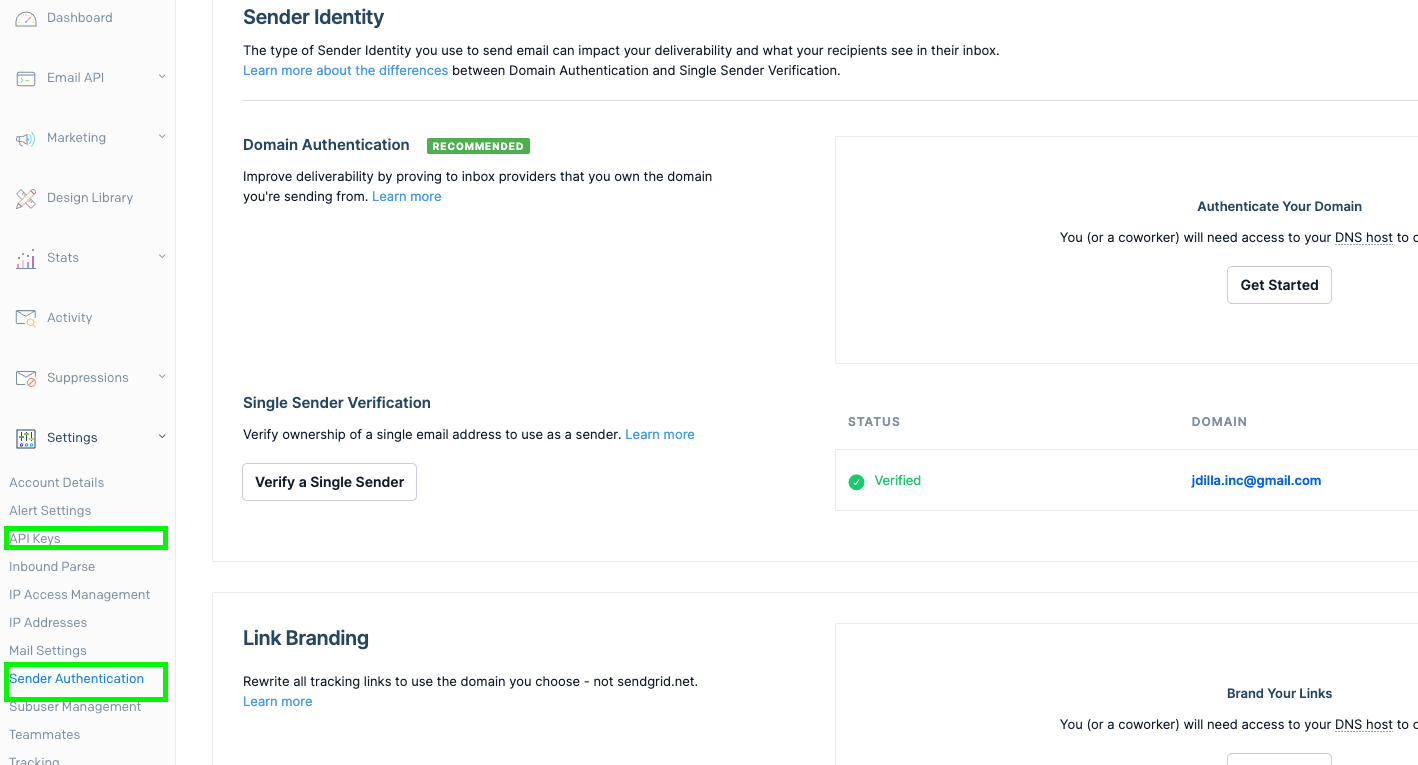
- You’ll need to verify your email address with SendGrid, which you can do here: https://app.sendgrid.com/settings/sender_auth. It’s pretty self explanatory and they have good docs.
- Create a SendGrid API key and hold onto it, you’ll need it in a second. You can do that here: https://app.sendgrid.com/settings/api_keys
Note: SendGrid is free for up to 100 emails a month, beyond that you’ll need to pay.
Create a CustomGPT
- Go to create a CustomGPT(https://chat.openai.com/gpts/editor)
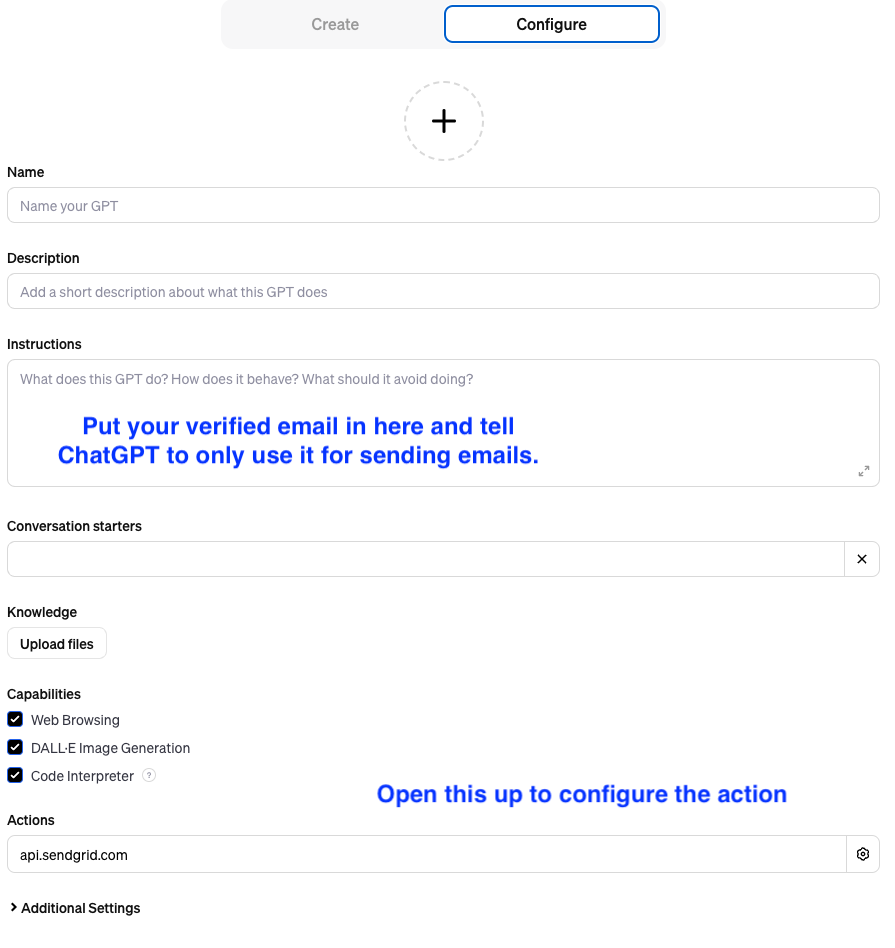
- Go to the configure tab
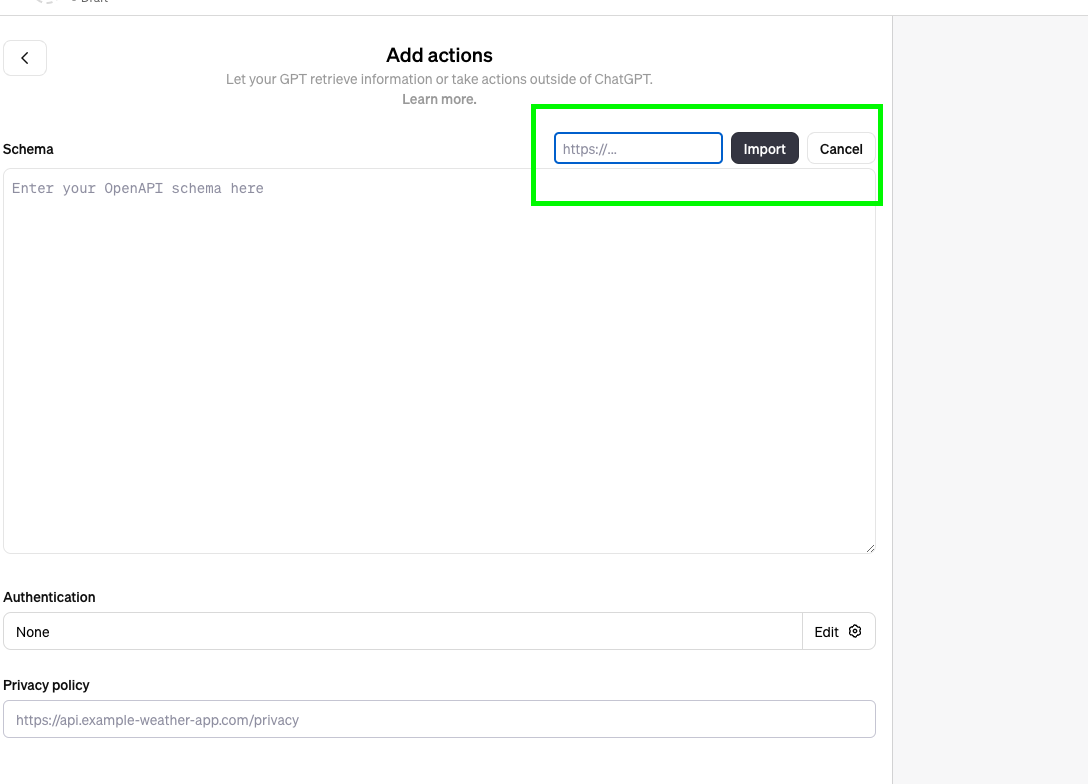
- Go to add actions
- Import the json file: You can place this link in the import schema field or copy and paste from this github file into the OpenAI action schema.
- Add your API key to the authentication field with auth type Bearer. Save your action.
- In the Instructions field for your CustomGPT, instruct your CustomGPT on how to use the email action. It’s super important that you tell it to only use your verified email address, otherwise you’ll get errors from the SendGrid API, but I also give it a sender name to make things appear a little nicer in my inbox. When you’re done, save the CustomGPT.
My instructions
When using the api.sendgrid.com action to send emails, always use the email address <TheEmailAddressYouVerifiedAbove@example.com> no matter what. The best sender name to use is
Name you Prefer to be called.
Send an email
- Start using ChatGPT as you normally would. When you want to email something, prompt it to do so.
- You’ll get a dialog making sure you’re okay with CustomGPT taking this action. Make sure to press “Allow”. You should see a confirmation message and your email will get sent. In practice, it is a little bulky, but it will get smoother with time.
Things to try next
I haven’t tried this yet, but I suspect I’ll be able to configure the bot with multiple accounts. So I’ll be able to say email so and so from my work email or email my wife from my personal email.
If you get a chance to use this, I’d love to hear how you’re doing it. Drop me an email at jdilla.xyz@gmail.com from your next CustomGPT chat!
Visuals for those who find that easier to follow
Important places in the SendGrid UI
CustomGPT action json import
CustomGPT action authentication configuration

CustomGPT instructions
2023-11-16